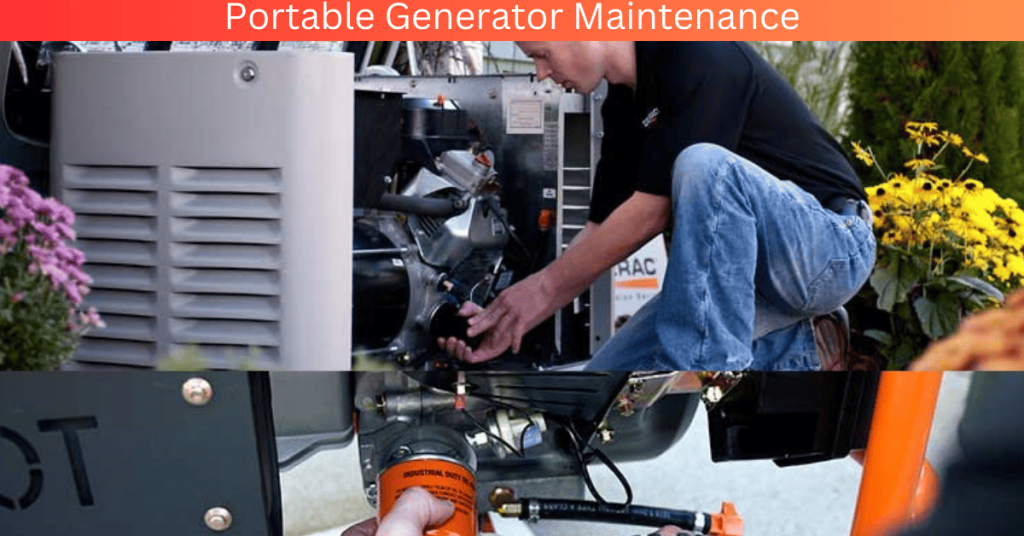
When you own a portable generator, you want to make sure that it runs smoothly and efficiently. Keeping your generator in good condition is essential to ensure that it performs safely and reliably. That’s why I’m going to provide you with all the necessary information on how to keep your portable generator running smoothly.
In this article, I’ll go over some of the steps you need to take in order to maintain your portable generator.
From regular cleaning, refuelling and oil changes, I’ll walk you through everything you need to know about caring for your generator and keeping it in top shape.
So let’s get started – read on for my practical guide on how to keep your portable generator running smoothly!
Cleaning The Generator
Cleaning your generator is an essential step in keeping it running smoothly. It’s a pretty simple process that doesn’t take long and will make all the difference.
I always start by turning off the fuel line, unplugging the machine, and letting it cool down for 15-20 minutes. This ensures there’s no chance of any gas or oil leaking onto me while I’m cleaning.
Once the generator has cooled down, I use a damp cloth to wipe down the exterior of the machine and remove any dirt or debris from its surface. Then, I check for internal blockages by looking at the spark plug, air filter, and exhaust port for any signs of damage or clogs.
Overall, this process takes only about 10 minutes and will ensure your generator is free from dirt and debris that could cause it to malfunction. With a clean generator in hand, now it’s time to check on one more important element – its fuel tank.
Checking The Fuel Tank
Fuel is essential for the proper functioning of your portable generator. It’s important to check the fuel tank regularly to make sure there’s enough fuel to keep your generator running. Let’s take a look at how you can do that easily.
First, switch off the generator and ensure it has cooled down before you open the fuel tank. This will help prevent any fire hazard. Next, unscrew the gas cap slowly and check if there’s enough fuel in the tank. Here’s a quick summary of what you need to watch out for:
| What to Check | Description | Reminder |
|---|---|---|
| Fuel Level | Is there enough fuel? | Switch off & cool down before opening fuel tank! |
| Gas Smell | Does it smell like gas? | Make sure there aren’t any gas leaks! |
| Fuel Color | Switch off & cool down before opening the fuel tank! |
Once you’ve checked these criteria, screw the gas cap back on and start up your generator again. As long as everything looks good with your fuel tank, then you’re ready to move on to checking another vital component – the oil level!
Checking The Oil Level
It’s essential to keep an eye on the oil level in your generator if you want it to run smoothly. Checking the oil level is a quick and easy process requiring no special tools.
All you have to do is locate the dipstick, remove it, wipe off any excess oil, re-insert it and check the level. If it’s low, you’ll need to top up with enough oil to bring it back up to the full line.
It’s important to use the type of oil recommended for your generator as specified in the manual. Generally, this will be just regular engine oil, but some generators require specific types of oil depending on their make and model. Make sure you read up on what type of oil your generator needs before topping off or replacing the old oil!
If you’re using your generator regularly, it’s wise to check the oil level every few weeks or so – especially if you’ve been running it for long periods. It only takes a couple of minutes and can save you a lot of hassle down the line!
Topping up with fresh oil now means fewer problems later – so don’t forget about this essential step in keeping your generator running smoothly. Ready for our next step? We’ll move on to replacing the old oil with new!
Replacing The Oil
Now that you have checked your oil level, it’s time to replace it. Replacing the oil in your generator is one of the most important steps in keeping your machine running smoothly and efficiently. It’s important to do this every three months or after every 50 hours of use – whichever comes first.
When you’re ready to replace the oil, start by draining the old oil from the engine. To do this, make sure your generator is on a flat surface so that all the oil can be easily drained out. Then remove the drain plug and allow the used oil to drain out into an approved container for proper disposal completely. Once all of the old oil has been removed, reinstall the drain plug and tighten it securely with a wrench.
Now it’s time to add new oil back into your generator’s engine. Be sure to use only high-grade motor oil that meets your generator manufacturer’s specifications for viscosity, type, and grade. Make sure to fill up with just enough engine oil as specified in your owner’s manual – usually about one quart per 25 horsepower rating – but don’t overfill!
Once you’ve added new oil to your machine, clean up any spills immediately with a rag or paper towel and dispose of them properly according to local regulations. With that done, you’re ready to move on to replacing the air filter!
Replacing The Air Filter
Replacing the air filter is an essential part of keeping your portable generator running smoothly. It’s important to check your generator’s air filter every time you use it, and replace it when necessary.
Here’s an easy guide to changing the air filter on your portable generator:
| Step | Description | Time Required |
|---|---|---|
| 1 | Locate the air filter cover and remove it. | 5 minutes |
| 2 | Take out the old air filter. | 3 minutes |
| 3 | Insert a new air filter and secure the cover. Make sure that all screws are tightened properly. | 7 minutes |
| 4 | Check for any visible signs of damage or debris around the area where the old air filter was located. Clean up if required. | 5 minutes |
Changing your generator’s air filter is a relatively quick process, but it’s very important for keeping your engine running smoothly – not to mention preventing costly repairs in the long run! So don’t forget to check your generator’s air filter every time you fire it up, and replace it when necessary. That said, let’s move on to replacing the spark plug- another crucial component of maintaining your portable generator!
Replacing The Spark Plug
Taking care of your portable generator doesn’t have to be overwhelming. Replacing the spark plug is one of the most important steps in ensuring it runs smoothly. It’s a simple enough task that can be completed in just a few minutes and will help you avoid any costly repairs down the road.
First, identify the type of spark plug your generator needs and make sure the appropriate replacement.
Once you’ve got it in hand, turn off your generator and disconnect the spark plug wire from its terminals.
Next, use an adjustable wrench to unscrew the old spark plug and replace it with your new one.
As you tighten it, make sure not to overtighten it, or you could damage the threads in the engine head.
When everything’s secure and tight, reattach the spark plug wire, and you’re done!
This small but important task can help keep your portable generator running like a well-oiled machine for years to come. With this maintenance check completed, let’s move on to adjusting the throttle for optimal performance.
Adjusting The Throttle
Great! You’ve just replaced the spark plug, and now your generator is ready to go. But wait – before you fire it up, you need to adjust the throttle. It’s a simple process that will ensure your generator runs smoothly and efficiently.
First, locate the throttle lever on the side of your generator. It should be quite easy to find as it’s usually labelled clearly. Once you’ve got it in sight, turn the engine off and move the lever to its highest position. You’ll know you’ve done this correctly when the lever locks into place with a click.
The next step is to adjust the idle speed, which requires that you start up your generator. Make sure to keep an eye on the RPM gauge while doing this; if it drops below a certain level, you’ll need to move the throttle lever back down until you get a stable reading on the gauge.
Once everything looks good, then all you have left to do is check your battery connections and ensure they’re secure for safe operation–but more on that later!
Checking The Battery
I’m sure I’m not the only one who’s had their portable generator suddenly stop working. It’s a real bummer, and before you know it, you’re stuck in the dark with no power. But there’s no need to worry – with a few simple maintenance tips, and you can keep your generator running smoothly. Let’s take a look at checking the battery!
To ensure that your battery is functioning properly, it’s important to check its charge and capacity levels. Here’s how:
| Step | What to Look For | How You Can Test |
|---|---|---|
| 1 | Battery Charge Level | Check the voltage using a multimeter or voltmeter. The reading should be between 12-14 volts for lead acid batteries. |
| 2 | Capacity Level of Battery Cells | Use an electrolyte gravity tester or conductance tester to measure each cell’s specific gravity or conductance. Each cell should read 1.265-1.295 for lead acid batteries. |
| 3 | Terminals & Connections | Check the terminals and cables to ensure they are clean and free of corrosion, as well as tight and secure in their connections. Loose connections can cause voltage drops, resulting in poor performance or failure of electrical components on the generator. |
If everything looks good after testing, then your battery is most likely functioning correctly! However, if any issues arise during this process, then it may be time to replace worn or damaged parts – but more on that later!
Replacing Worn Or Damaged Parts
Replacing worn or damaged parts is a crucial step when it comes to keeping your portable generator running efficiently. It’s important to check for any worn or damaged parts before operating the machine and replace them as soon as possible. This can include spark plugs, air filters, fuel filters, oil filters, and much more.
When it comes to replacing these parts, it’s best that you purchase genuine replacements from the manufacturer. Doing so ensures that the part is compatible with the model of the generator you own. It also ensures that you get a quality part that will be able to withstand the conditions in which your generator operates without breaking down prematurely.
It’s also important to have a basic understanding of how to identify worn or damaged parts and how to properly install them. This knowledge can help save time and money when it comes time for repairs or replacement of your device.
With this information in hand, you’ll be able to keep your portable generator running smoothly for years to come–without having to worry about breakdowns or expensive repairs constantly.
Now let’s move on to scheduling regular maintenance checks for your portable generator.
Scheduling Regular Maintenance Checks
Now that you’ve replaced any worn or damaged parts your generator may have had, it’s important to commit to regular maintenance checks. When it comes to keeping your generator safe and running smoothly, little things can make a big difference.
The most important thing you can do is check your oil levels every time you use the generator. This will help avoid costly repairs down the road and keep your generator running optimally.
It’s also important to inspect the fuel filter regularly for any signs of dirt or debris that might be clogging it. And don’t forget to check the spark plugs, too – they should be checked every few months and replaced as necessary.
Regular maintenance checks are crucial for making sure your portable generator runs safely and efficiently for years to come. Taking the time to visually inspect all of the components before each use and replacing any worn-out parts can save you a lot of trouble in the long run.
Plus, doing regular maintenance on your generator can help ensure its longevity, so you won’t have to replace it anytime soon!
Frequently Asked Questions
How Often Should I Perform Maintenance Checks On My Portable Generator?
It’s important to perform regular maintenance checks on your portable generator.
Depending on the model and how often you use it, you should check it at least once every three months.
Make sure the fuel lines, oil levels, and spark plugs are all functioning correctly.
Check for any potential leaks or signs of wear and tear that may need repair or replacement.
Regular maintenance will help ensure your portable generator runs smoothly and safely.
Is It Necessary To Use Special Oil For My Generator?
It is absolutely necessary to use special oil for your generator.
Regular automotive oil won’t do the job and can cause damage over time.
Most portable generators will require 10W-30 or 10W-40 oil, but it’s important to check your owner’s manual for exact specifications.
Make sure to use the right kind of oil so you don’t have any issues with your generator down the road.
What Kind Of Battery Does My Generator Use?
If you have a portable generator, it’s important to know what kind of battery is powering it.
Most generators use a lead acid or gel battery, which can last for years with proper maintenance and care.
However, if you haven’t taken good care of your generator, it may be time to replace the battery.
Be sure to check your manufacturer’s manual for the correct type and size of the battery to ensure your generator runs smoothly and reliably.
What Type Of Spark Plug Should I Use For My Generator?
When it comes to your generator, the right spark plug can make all the difference! The type of spark plug you should use will depend on the make and model of your generator.
Generally speaking, most portable generators use a Champion RC12YC or equivalent spark plug. Double-check the manufacturer’s instructions before buying one, as different models may require different types of spark plugs.
If you’re not sure which type to get for your generator, ask a professional for help – they’ll be able to advise on what’s best for your particular model.
How Do I Adjust The Throttle On My Generator?
Adjusting the throttle on your generator might seem intimidating, but it’s actually pretty straightforward. First, make sure that the engine is turned off and cooled down before you start.
Then, locate the throttle control, which is usually a lever or knob near the engine. Once you’ve identified it, adjust the speed using either clockwise or counterclockwise motions until you reach your desired setting.
To check that you’ve got your throttle set correctly, start up your generator and see how it runs – if there are any problems, just turn the lever again until you find the ideal setting for your needs!
Conclusion
Conclusion:
Maintaining your portable generator regularly is important to ensure it is running safely and efficiently. You should check your generator every month or two to make sure everything is in good working order.
It’s also important to use the correct type of oil, battery, and spark plug for your specific generator.
Finally, you should adjust the throttle as needed so that your generator runs at the right speed.
Taking these steps will help keep your generator running smoothly and reliably for years to come. I hope this maintenance guide has been helpful in keeping your portable generator running like new!
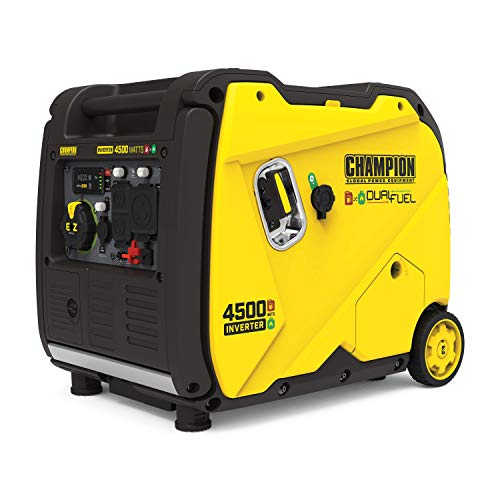
Low-Maintenance Generators We Recommend (2026)
As an Amazon Associate we earn from qualifying purchases. Prices and availability are accurate as of the date/time indicated and are subject to change.
For more options, see our full guide: best high-wattage generators.