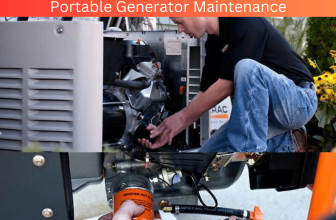
Is your portable generator causing more problems than convenience?

Fret not! I’m here to lend valuable insight into how you can resolve these problems effortlessly. Here are a few steps that will aid in diagnosing and fixing any problems associated with operating one’s own power source – be it for camping adventures or prolonged electrical outages.
This article presents easy-to-follow guidelines backed by expert knowledge so as to empower readers in swiftly tackling any hurdles when it comes to optimizing their energy resources.
Checking Your Generator’s Fuel Supply
We’ve all been there – excitedly anticipating taking our portable generator out for a spin only to have it cause us problems at every turn. But don’t worry! With these fast and straightforward solutions available to you, you’ll have that generator starting up in no time flat. First things first, – inspect your fuel supply.
If your generator won’t kick off as planned it may be due either to an insufficient flow or lack of gasoline in the tank altogether. Make sure you check this out before moving on. Find the tank and confirm that it contains enough petrol for smooth operation of your machine.
Once satisfied regarding this aspect, move onto checking the spark plugs. Ensure they are clean and tightly fitted into their sockets so that they fire correctly when trying to ignite your engine again!
Examining The Spark Plugs
Let’s move onto the next step: tackling those pesky spark plugs. Although a simple job at its core, it can become quite tedious if you don’t have adequate equipment at hand.

Begin by locating the spark plug wires and gently removing them from their sockets one by one with care. Using either a socket or wrench specifically designed for this purpose remove each of the plugs individually while ensuring you remember which wire attaches to which piece since they all vary in size and strength.
Once you have taken out all of your generators spark plugs, give them an extensive examination for any signs of problems such as cracks in their porcelain area or debris accumulation from engine use over time.
If any appear defective or worn down beyond repair standards, replace these parts with new components that precisely match their original specifications. This ensures optimal performance over extended periods without problems like failure risks cropping up unexpectedly. Be sure to inspect closely for carbon deposits on each electrode as well since this could indicate the generator is running too rich or too lean.
Finally, after verifying everything is in tiptop shape and any required changes are made place each spark plug back into their respective locations and tighten them securely with your wrench or socket.
After laying a groundwork of understanding, it’s time to proceed with examining the air filter.
We’ll dig deeper into its workings and significance.
Inspecting The Air Filter
Portable generators are an essential tool that helps us power through emergencies and outdoor activities alike but they do require maintenance from time to time. The most common issue we face is the malfunctioning of our machines due to an uncleaned air filter which goes unnoticed at times.
So before proceeding towards other components that might be responsible for poor performance or stalling of our generator engines a thorough inspection of the air filters must occur.
Start by checking their conditions: Are they clogged or dirty? Or have they become wet? If yes, replace them carefully while keeping old components handy for future reference and troubleshooting needs which will come in handy later on.
Adjusting The Carburetor
To effectively troubleshoot your generator we must turn our attention to an essential component – the carburetor. Regulating airflow before fuel enters your engine is its primary function and misaligned settings drastically impact performance and overall functionality. Accessing this integral part involves opening its cover and exposing two screws that control fuel and air input – located on opposite ends of the spring loaded valve.
With careful adjustment using a screwdriver, you’ll notice a soft humming sound emanate from inside once you’ve achieved optimal regulation levels. Having completed these necessary tweaks, let us now shift focus onto verifying our battery charge accurately. This process requires the use of either a multimeter or voltmeter to provide accurate readings on how much voltage remains in our battery.
It’s important to double-check all connections for their security and keep your safety gear within reach before initiating any task.
Verifying The Battery Charge
Don’t let a poorly functioning generator get in the way of smooth operations. Take proactive steps by checking your battery charge status regularly.
To accomplish this task accurately without relying on guesswork requires a voltmeter – an essential tool you can purchase at any home improvement store or online retailer.
Prioritizing safety should be a top priority when handling electrical equipment.
For instance, before proceeding with measuring voltage levels using the voltmeter and connecting it to your six-volt generator battery terminals one by one, consider familiarizing yourself with device instructions carefully first if you’re not already aware of them. Handling it negligently could lead to unpleasant consequences or problems for various contraptions in use around you.
Once comfortable with using the gadget safely under guidance from manufacturers’ recommendations connect each terminal to its corresponding probe socket on the voltmeter (or measure) then check expected voltage levels (around 6V +/-). If they fall below this average number don’t despair. Simply recharge your battery or dispose of it appropriately and replace it entirely if needed.
After getting your battery in top shape, consider performing routine inspections on its components for any wear or damage or problems that may impede their ability to perform optimally.
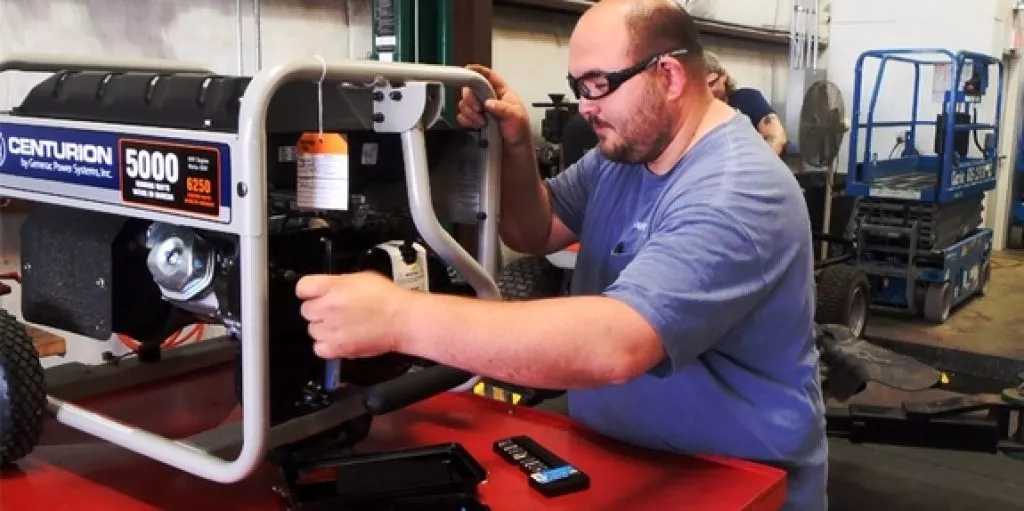
Replacing Worn Parts
In order to run properly your portable generator needs all of its parts to be in good condition. So it is essential to check them regularly! After making sure that the battery charge is good, start by examining both fuel lines and filters for any wear or damage. Replace immediately if necessary. Then focus on the spark plug and air filter. Clean off dirt or debris (if present) using a rag or brush— replacing with new ones from an established supplier may also be necessary.
Finally, confirm whether engine oil levels are adequate. If not, top up as soon as possible! These steps will help extend your generators lifespan significantly. Once completed successfully, performing a voltage test can assure you everything works well.
Performing A Voltage Test
Don’t let a misbehaving portable generator add stress and frustration to your day. Instead, take charge with some basic knowledge by performing a quick voltage test. The process can be done quickly and easily if you’re equipped with the right tools.
First off, grab either a multimeter or an analog voltage meter before attaching one probe from your chosen device onto one of the two output terminals on your generator. Then, securely attach the other probe onto any metal surface that forms part of its framework. This will produce accurate readings during inspection.
With everything correctly connected, turn it all on and observe readings given by either your multimeter or analog device. If measurements are hovering around 120V then great news! If not don’t get discouraged as further investigation may be required to uncover any underlying problems
.
Now we’ve identified the importance of conducting a voltage test, let’s move onto some tips for cleaning your generator to ensure it runs at an optimal level.
Cleaning The Generator
It is no secret that keeping a generator running smoothly over time requires a bit of maintenance. Key among these tasks is cleaning out any dirt or debris that may cause problems like unwanted interference in its operation. But how exactly does one clean their generator?
First off, gather together some basic supplies – namely a soft cloth for wiping down surfaces, a gentle brush for those pesky hard to reach areas like fans or vents and potentially a vacuum cleaner (on low power) for any stubborn dust spots. Starting with the exterior of the unit itself, use the soft cloth to gently wipe away any visible dirt or dust buildups. Feeling confident?
Great! Now it’s time to delve into those deeper crevices with the soft brush. Take extra care not to damage any fragile components as you work here. Finally, if there are any pesky bits of debris that just won’t go away with traditional methods alone reach for your trusty vacuum cleaner at low power. Slowly and steadily, work through the interior space until everything is looking clean and clear once more.
With these steps complete, you’re well on your way towards maintaining an efficient generator system over time. By being proactive about cleaning now and again alongside utilizing battery chargers as needed when components inevitably wear down you can avoid costly breakdowns due to serious problems in future years.
Utilizing A Battery Charger

Has your portable generator been causing frustration lately due to malfunctions or other problems? If so don’t worry – solving these problems is often easier than we might think! In fact, taking some time to troubleshoot these problems today can save us many headaches further down the line. One highly effective solution for resolving generator problems is through utilizing a battery charger.
To start this process off, properly begin by plugging your generator into an AC outlet. Next up, attach appropriately sized battery charger leads onto both terminals of the affected battery.
Before beginning any charging however ensure that all connections are firmly in place. From there set your charger for 6 volts and wait as it begins working its magic. As with any kind of charging procedure involving batteries though remember to keep an eye on things throughout the entirety of the charging process itself. Overcharging can damage batteries fast, so proceed carefully! If voltage rises too quickly during charging, simply turn down the charge rate by decreasing settings until things stabilize around 6 volts again.


Depending on how depleted our initial energy levels were however will determine exactly how long this charge takes (generally just a few hours though).  By following this protocol faithfully, however, we're sure that you'll be able to get your generator back up and working with full efficiency and power once again in no time! Greetings gearheads! Let's shift our focus over today to monitoring our vehicle's oil levels.
You see, maintaining your engine requires microscopic attention to detail. A simplistic task like ensuring that you’ve got enough lubrication can make or break its longevity.
To begin with, park up at an even surface (preferably after the engine has given up running for at least five minutes) before giving attention towards the oil reservoir that houses all those precious fluids. The key here is utilizing instrumentation. Grab hold of that metallic dipstick jutting out of your engine block and give it a good wipe over before reinserting again.
Once done, simply drag that stick back out for another inspection. Checkmark where exactly does that fluid sit between those MINIMUM and MAXIMUM notches etched into its metal or plastic surface as supposed to ensure optimal functioning of that machinery under hood!
Routinely scrutinizing these indices will reveal any depletion in quality or quantity so you can take swift action—usually topping it off with recommended oils for best results. Always keep in mind how regular checks like these are vital for extending our automobile lifespan!
Checking The Oil Level
Is your portable generator giving you headache?
Fear not! We’ve got some quick solutions to help you get back on track! But before we dive in let’s take a moment to check your oil levels. Heres what you need to know:
To keep your engine running smoothly and prevent any unwanted issues make sure those dipstick markings are at least 3/4 full or just above the “Add” mark. If they’re lower than that don’t sweat it – just grab a funnel and add enough oil until you reach the ideal level indicated on the dipstick markings.
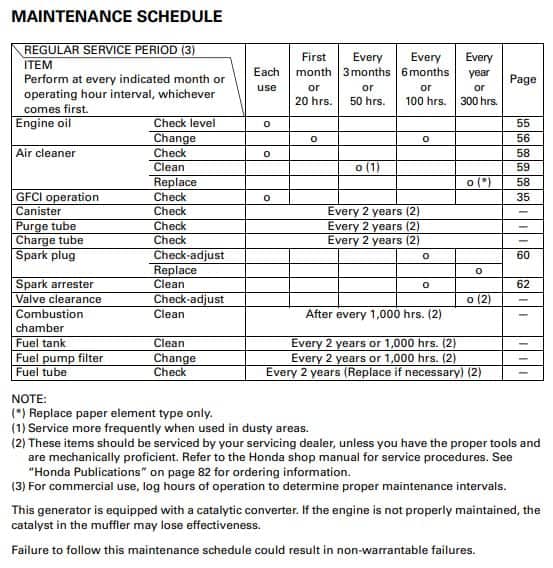
Need more guidance? Refer to the handy chart provided above for more information on measurement and oil type recommendations for 4 stroke engines. For an optimal performance out of your 4 stroke engine – whether it be a generator or other equipment – its crucial that you use the correct weight and quantity of motor oil.
Depending on your specific model somewhere between 19 and 20 ounces should suffice. Don’t risk getting this wrong. Always refer back to the user manual for exact guidelines. But it’s not only quantity that matters; quality is also key.
To ensure smooth operation over time stick with either synthetic blend or full synthetic motor oils rated at either 10W 30 or 5W 30. Any deviations from these standards could compromise your engines integrity that bring more problems down the road. With all this in mind follow these guidelines closely and rest assured that your equipment will keep humming along for many years to come.
Frequently Asked Questions
How Often Should I Service My Generator?
The last thing we want when using our generators is having problems like unexpected malfunctions or poor performance due to neglecting maintenance practices. To avoid these problems altogether requires some effort on our part. Thus, making sure we have scheduled regular servicing appointments with qualified technicians that understand these machines well enough.
For most generators out there today a service interval of every 12-18 months is recommended based on usage frequency which ensures that engines run smoothly while also preventing any long term problems from developing over time due to wear and tear or excessive strain placed upon them through repeated use patterns.
Is It Safe To Use A Generator Indoors?
It is imperative to bear in mind the following: running generators indoors poses significant problems and risks and should be avoided altogether due to potentially fatal outcomes! Therefore, opt for well ventilated outdoor spaces with plenty of room when operating portable generators instead of indoor locations.
This measure becomes even more critical when you factor in that generators produce carbon monoxide – a colorless, odorless gas with serious health implications when breathed in at high levels. Consequently, always keep your generator at least ten feet away from any open windows or doors for enhanced safety during outdoor use.
Do I Need Any Special Tools To Work On My Generator?
The equipment necessary for repairing a generator can vary depending on the nature of the job at hand.
Straightforward tasks like replacing spark plugs or swapping out an air filter typically only require standard handtools like wrenches or screwdrivers.
If more complicated maintenance is required – such as revamping fuel systems or conducting electrical diagnostic tests – then specialized instruments may be necessary.
For optimal results, it is vital to reference the user manual provided by your generator manufacturer before commencing work. This guide will outline which exact instruments are required for each specific repair.What Should I Do If My Generator Won’t Start?
When dealing with a finicky generator begin by examining its fuel level – this could very well be the root of your problems! Make certain you’re using fresh gasoline as opposed to old fuel which could hinder performance significantly. In addition, make sure you’ve added enough oil before starting up again should levels be low! Checking both spark plugs and air filters for signs of dirt accumulation or damage from regular usage is also advisable. Replacing worn or dirty components will help maintain peak levels of productivity.
What Is The Best Way To Store My Generator When It’s Not In Use?
Proper generator storage should not be overlooked as it can have significant consequences and problems, namely, a malfunction or breakdown just when you need it most. To prevent these unfortunate event and problems from happening, store your generator in an area away from extreme weather conditions that is ventilated and dry – out of sight and reach of children.
Moreover, if storage is anticipated over an extended period make sure to fill the fuel tank with stabilizer – protecting against rust or other problems that may arise with misuse. Finally, before packing up for good measure unplug all associated items.
By following these basic guidelines you can ensure your generator will be ready when duty calls.
Conclusion
No power, no problems?
Well, not exactly! When unexpected outages strike having a reliable generator can be a lifesaver – provided of course that you know how to take care of it properly.

Keeping up with regular service appointments, storing it correctly, being equipped with all the necessary equipment – these are just some pointers among several that portable generator owners must follow diligently if they aspire for uninterrupted electricity supply anytime anywhere.
And in case Murphy’s law strikes despite your best efforts – don’t sweat it! Crisis management is what professionals are there for – so be sure to call them up at the earliest sign of trouble.
Remember: a little TLC goes a long way in extending the life and efficiency of your generator; failing which can land you in much more expensive waters down the line.
So let’s stay prepared folks! With some basic knowledge and foresight on our part we’ll never find ourselves powerless when we need it most.
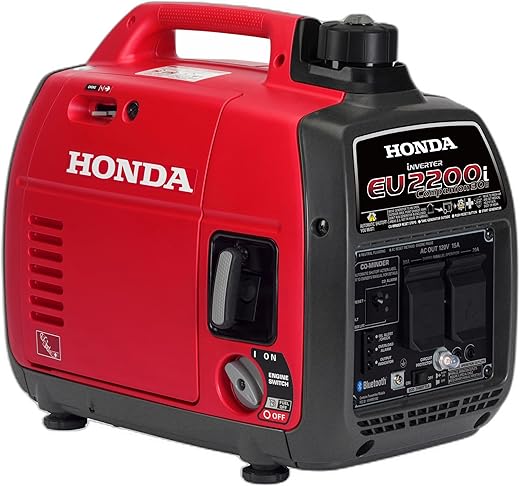
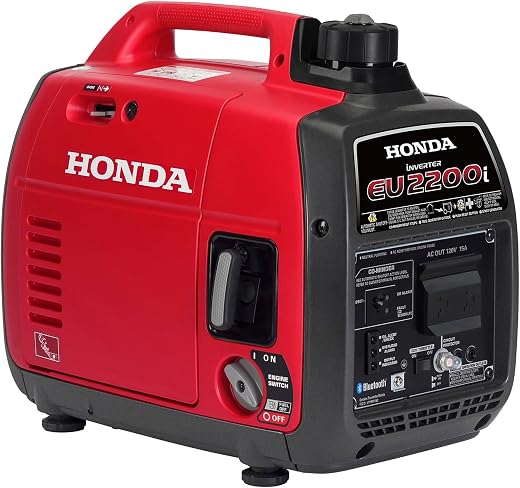
Reliable Generators We Recommend (2026)
As an Amazon Associate we earn from qualifying purchases. Prices and availability are accurate as of the date/time indicated and are subject to change.

For more options, see our full guide: best high-wattage generators.